Best Tradingview Setup: How to setup TradingView for the PowerX strategy by Rockwell Trading

In this article, I will show you step-by-step how to set up TradingView for the PowerX Strategy.
Let’s get started:
Here’s how to setup TradingView for the PowerX Strategy in 8 simple steps:
Step 1: Register for TradingView
It’s free, and if you don’t register, many of the features that I am showing you in this article won’t work.
You might even consider upgrading to the “Pro Version” for $14.95 per month. That’s the version that I have, and I think it’s well worth the price.
Step 2: Click on Full-Featured Chart
In order to add indicators to the chart and customize your layout, you need to click on Full-Featured Charts:
Step 3: Delete the Volume
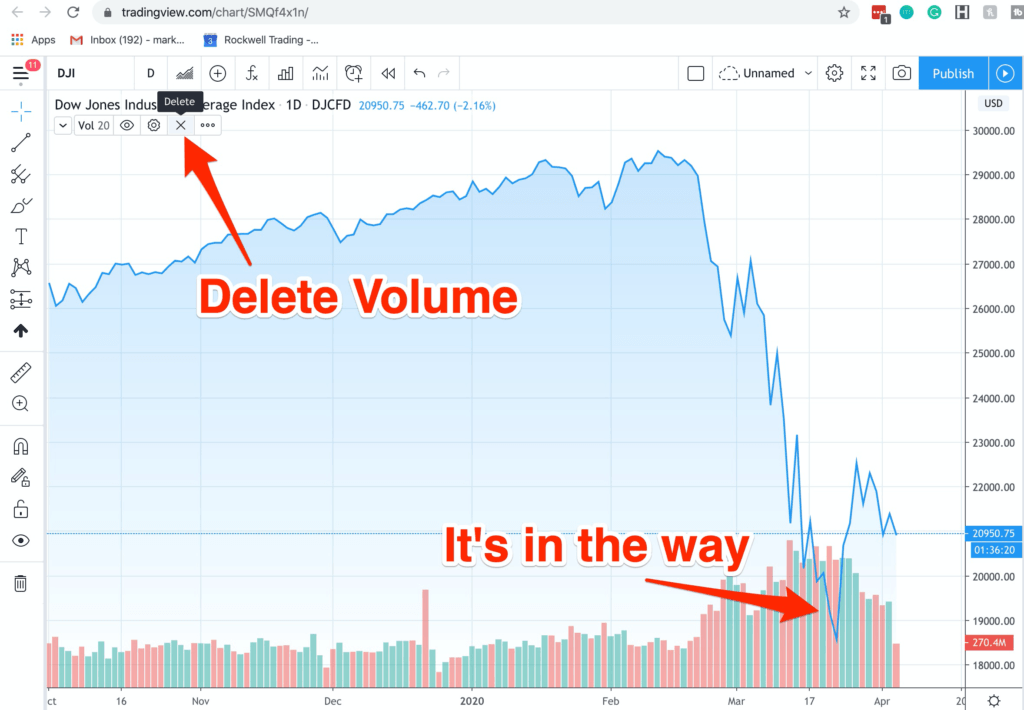
I personally don’t use volume information, and it’s in the way. In order to have a clean chart, delete the volume:
Step 4: Add The RSI And Configure It
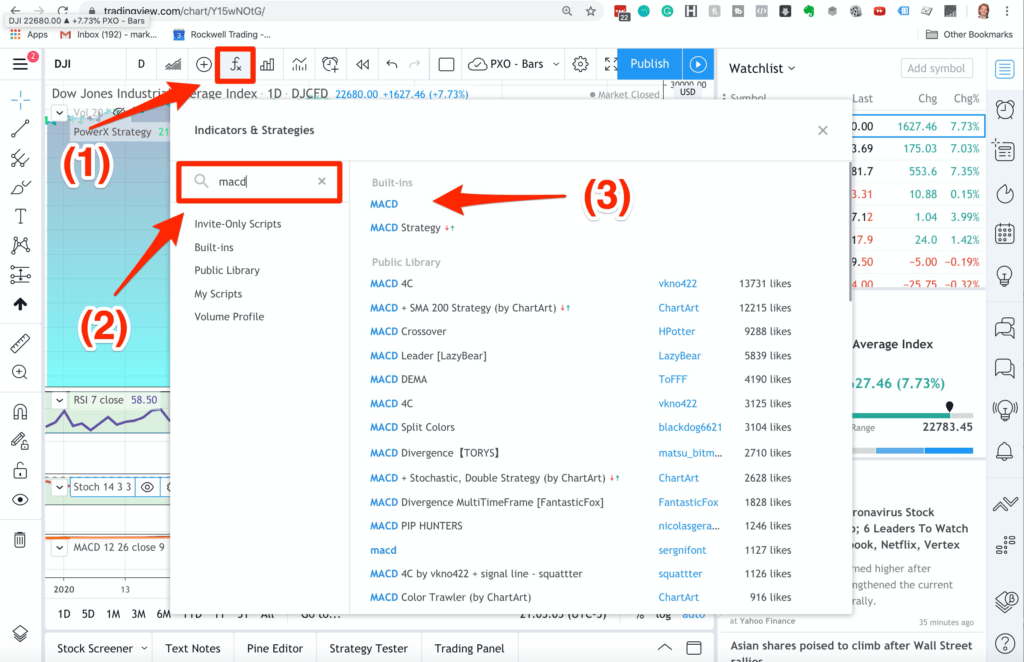
The next step is to add the indicators.
In order to add indicators…
- Click on the “F”
- Then enter “RSI” in the search field and
- Then select “Relative Strength Index”
Once the RSI Indicator is added to the charts, click on the gear icon to bring up the properties.
Now click on INPUT and change the LENGTH from 14 to 7.
And here’s how I select the STYLE of the indicator:

Changing the style is optional, but I like to change…
- The Upper Band to 100
- The Lower Band to 50 and
- The Background to GREEN with a 20% Opacity
Step 5: Add the Stochastics
The next indicator is the Stochastics.
We can add the Stochastic in the same way as we added the RSI:
- Click on the “F”
- Then enter “Stochastic” in the search field and
- Then select “Stochastic”
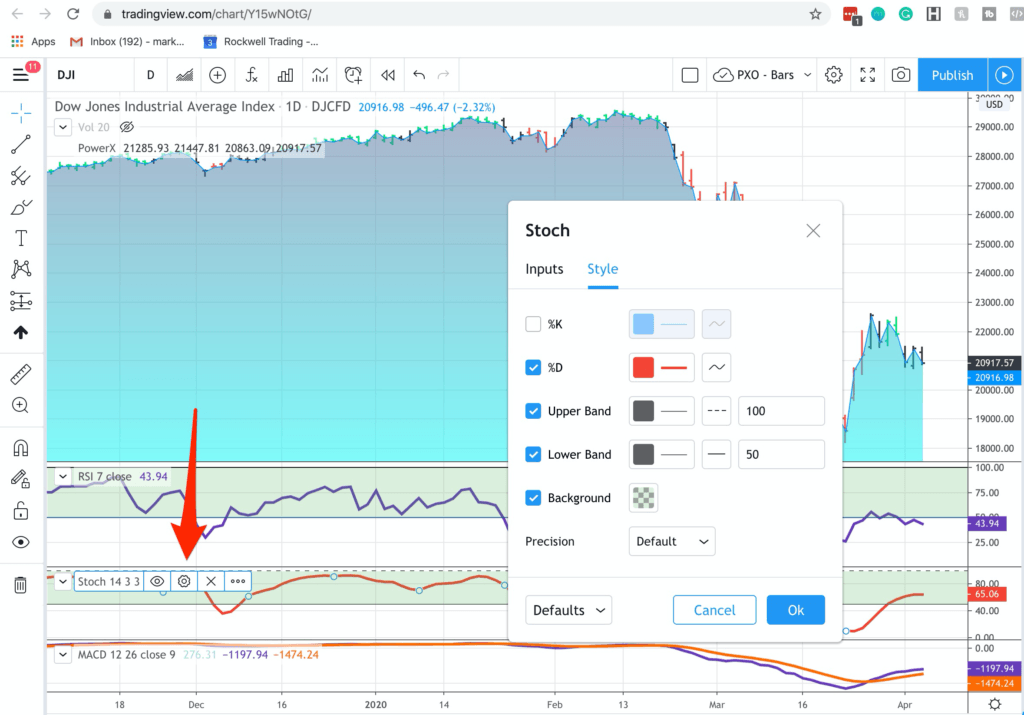
Here’s how to configure the Stochastic:
- Under INPUT, select 14, 3 and 3
And I like to change my STYLE settings as following:
- Uncheck %K
- Set the “Upper Band” to 100
- Set the “Lower Band” to 50
- Use GREEN for the “Background” with a 20% opacity
Step 6: Add the MACD
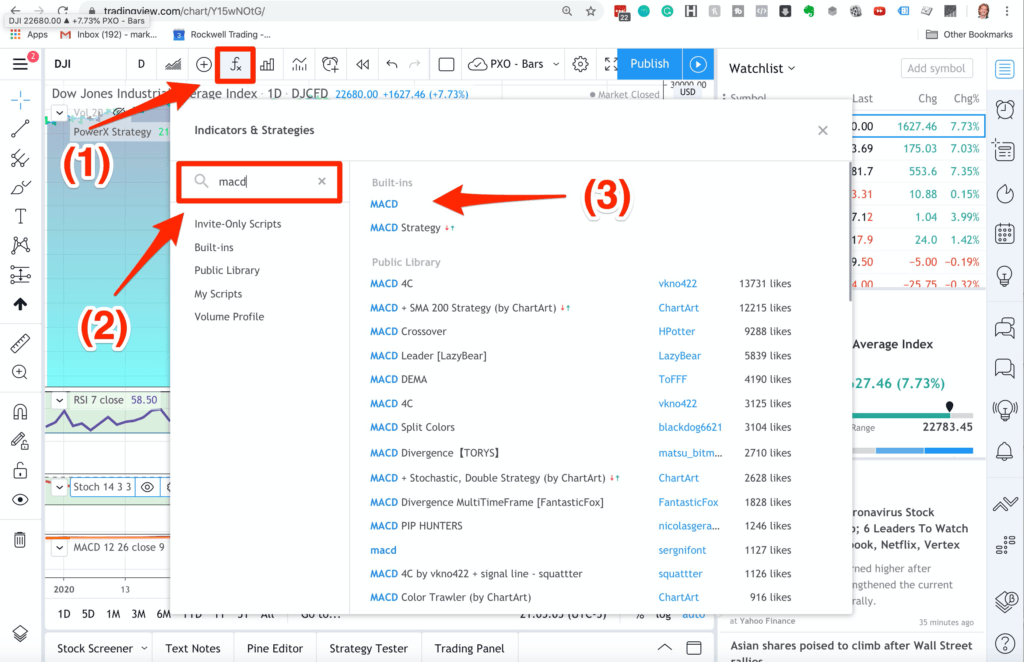
The next indicator is the MACD.
You can add it in the same way as we did before:
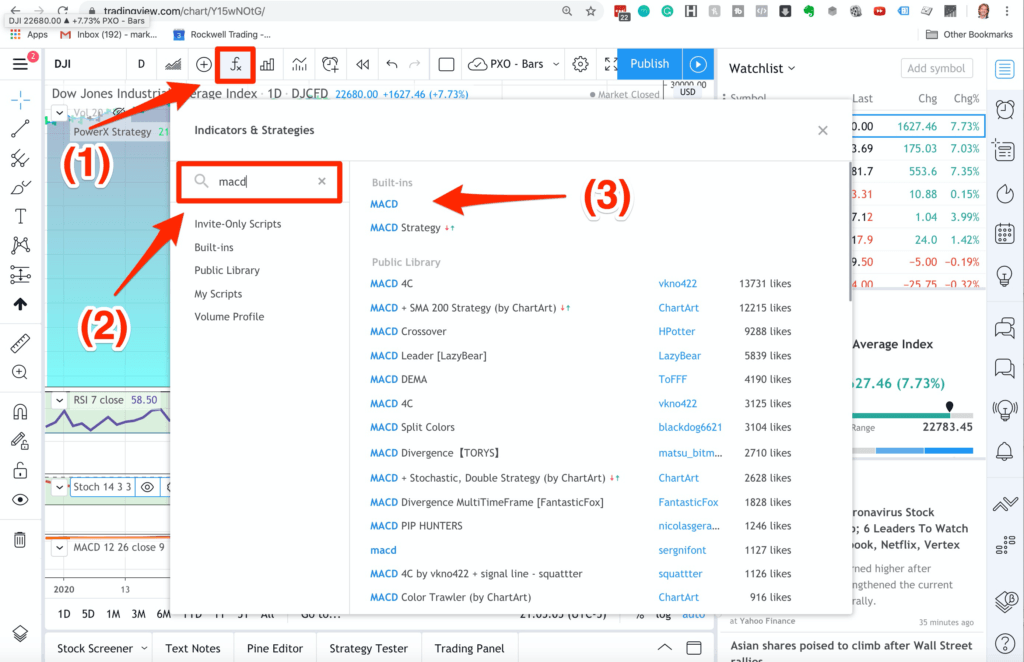
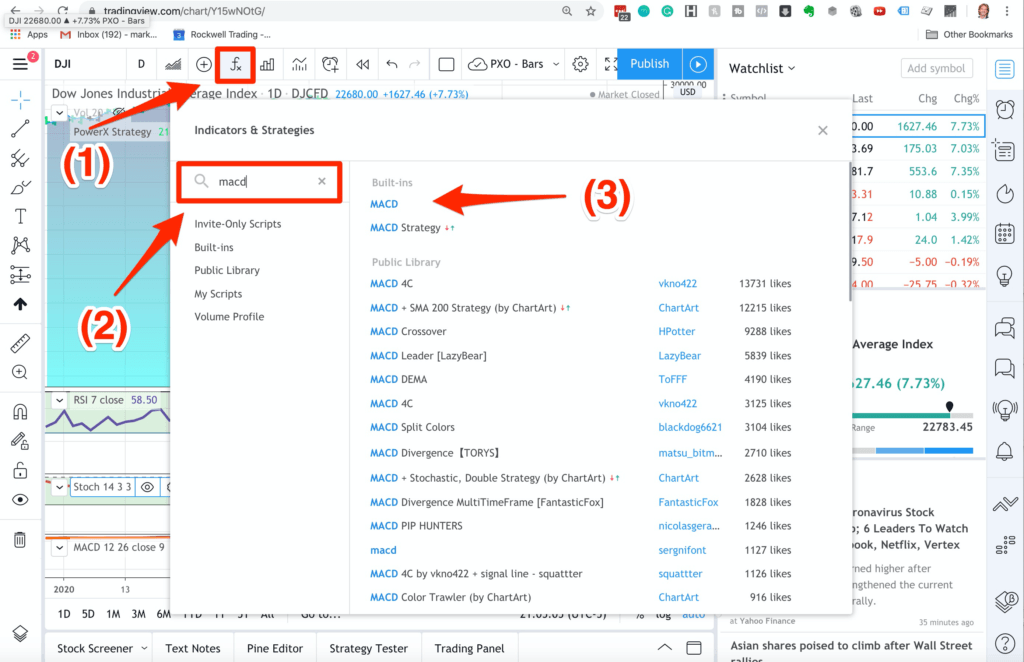
- Click on the “F”
- Then enter “MACD” in the search field and
- Then select “MACD”
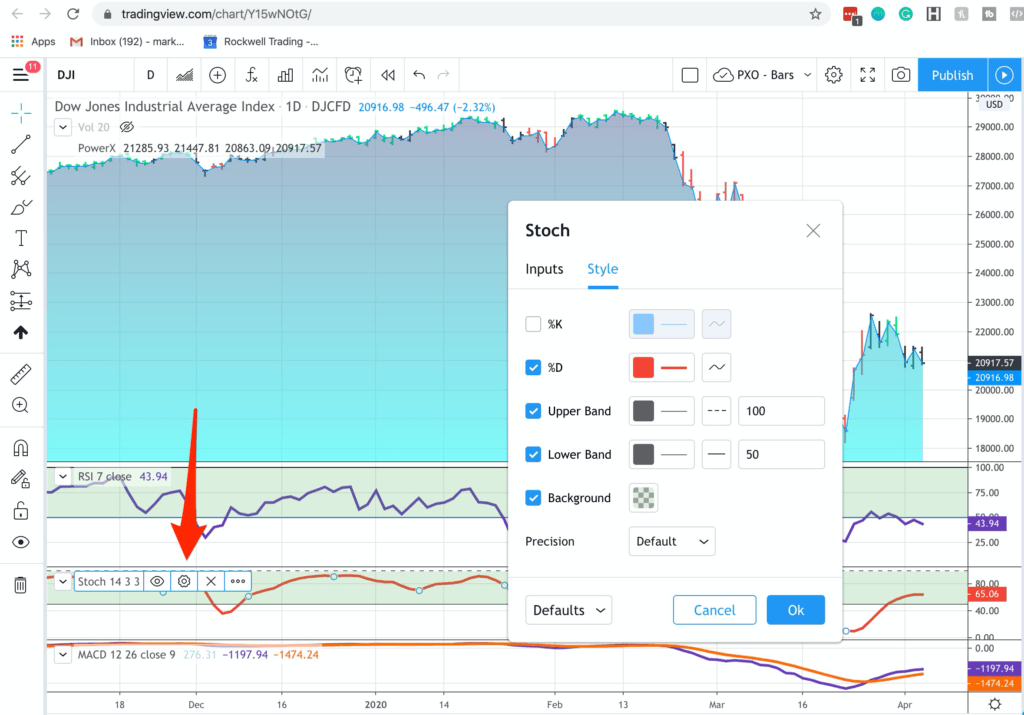
Here’s how to configure the Stochastic:
- Under INPUT, select 12, 26 and 9
And I like to change my STYLE settings as following:
- Uncheck the “Histogram”
- Change the color of the “MACD” to purple
- Change the color of the “Signal” to orange
Step 7: Add Rockwell PowerX
The next step is to add the bar coloring so that the bars are GREEN and RED according to the PowerX Strategy:
- Click on the “F”
- Then enter “PowerX” in the search field and
- Then select “PowerX Strategy Bar Coloring [OFFICIAL VERSION]”
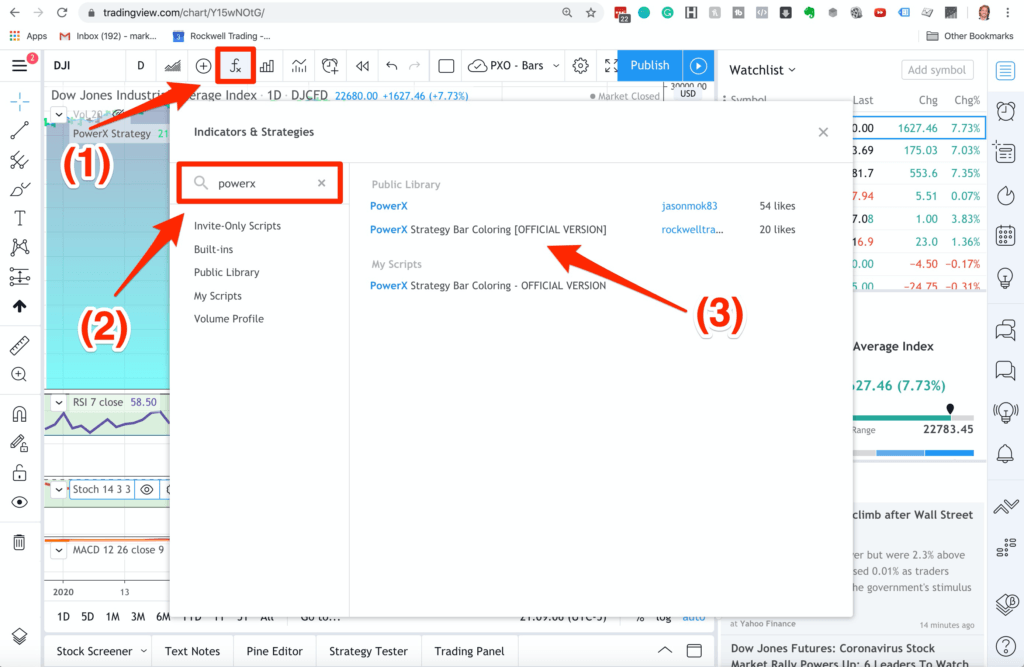
The good news: You don’t need to configure anything for this. :-)
Step 8: Save Your Chart Settings:
Your chart should now look like the chart below.
I highly recommend that you save your work:
- Click on the little ^ next to the GEAR icon
- Select a name and click on SAVE NOW

That’s it! You did it
Now you have setup TradingView for the PowerX Strategy, which — in my opinion — is the best TradingView Setup.
Hope this helps!
Author

Markus Heitkoetter
Rockwell Trading
As founder and CEO of Rockwell Trading Services LLC., Markus Heitkoetter has shared his trading methods and ideas with more than 300,000 traders in over 196 countries.